Planners

Planners
Planners

Scrapbooking

Scrapbooking
Scrapbooking

Party

Party
Party
Showing posts with label digital art. Show all posts

Heidi Swapp - AC Digitals


Today, Heidi Swapp's Dreamy collection is available at AC Digitals! I do love a good digital page every now and then. You know, those times when I really want to create but getting all my supplies out isn't an option. 

Digital scrapbooking is perfect for those small spaces! I have been re-organizing my space - again - for the fourth time this year. I think being organized in a small space is key. So, on those days where I take time to make sure my family room/craft area is clean, I am hesitant to start a new project. So, the next best thing is to get creative on the computer!


Visit AC Digitals to get 20% off Dreamy this week! 

Create Well: When creating your digital scrapbook page, make sure your document is 300dpi. Then, you can print your digital pages at your local printers (I print my 12x12 pages at Costco) with perfect resolutions.

Baby Shower Album

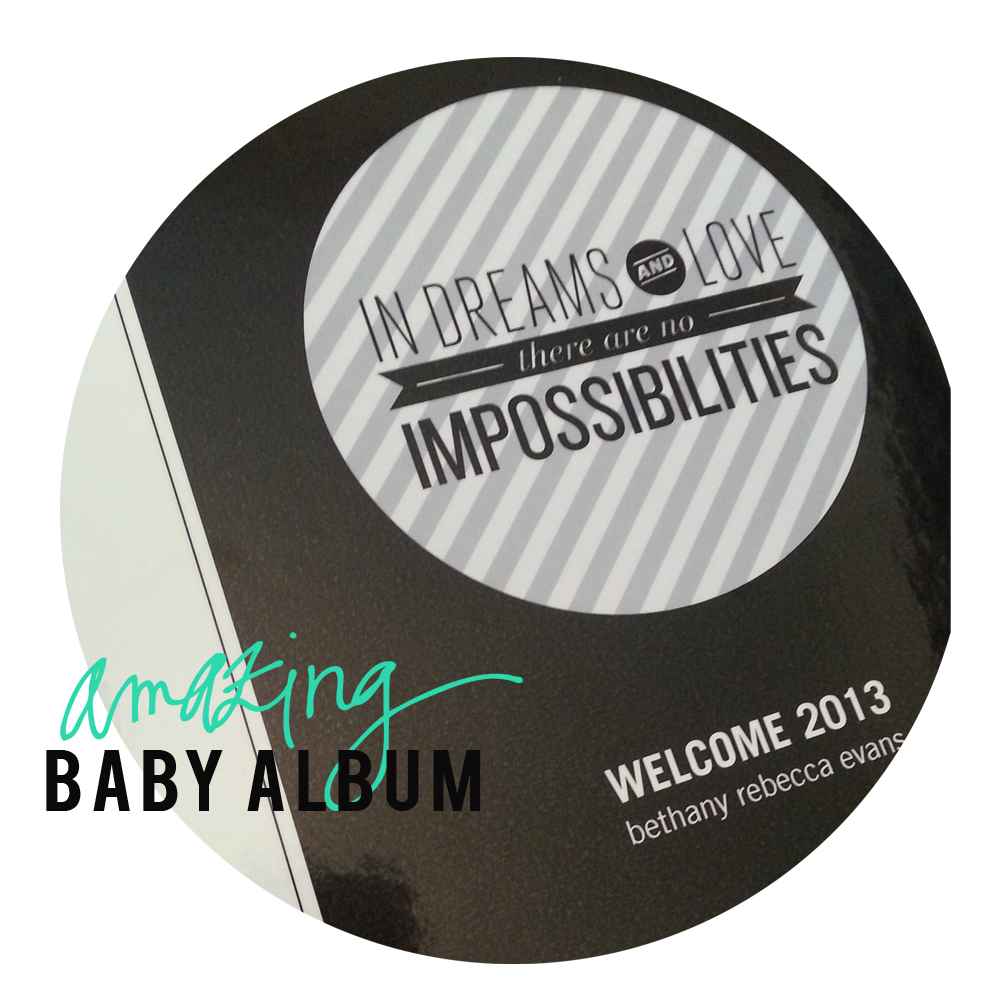
My baby shower is this Saturday and I wanted something special for friends and family to sign while they are there but I didn't just want a simple guest book. I wanted something that would last and share a little bit about Bethany's story.

Yes, our little one's name is Bethany Rebecca. Funny. We weren't going to tell anyone the name until she was born, but my dear husband was nesting a couple of weeks ago. Did you know it could happen to the father too? Well, believe me, it can. My husband decided he was going to cook up three meals fifteen minutes before he was suppose to be in bed for work to get up early the next morning. Needless to say, he could barely stand up by the time he was done in the kitchen two hours later. He was muttering something about not knowing why we were even keeping the baby's name a secret.

The next afternoon, he calls me before heading home from work and says to me that he thinks my sister called him the night before and he thinks he told her the baby's name. So, I call Becca and - no - he called my sister while half asleep and told her the baby's name. I love that she kindly said, "Dave, I am honored that you named the baby after me. But, it is late and it sounds like you are suppose to be asleep." Ha! Well, at least we have a great story to tell. I love my husband. He keeps life fun. ;)

Here is a peek inside the Shutterfly album that I created using the Wedding Guest Book Story Telling Style template. I don't mind using the templates they provide because they have some outstanding designers collaborating with them! Plus, it saves me tons of time!


Photo books are the perfect gift for any occasion.


Valentine's Day Inspiration

Have you noticed my new look for the month? Oh yeah, Heidi Swapp has some new digi items in her shop and I got a chance to play with them yesterday! Seriously, they are awesome! I mean, how much fun would it be just to print them out and give them away with a little bit of ribbon added?


These are glittered and what I used in my banner. I love glitter that doesn't rub off on to my hands! ;)


These are perfect for your Silhouette. I am SOOO cutting some of these bad boys out!


And if that wasn't enough, she also has new digi papers that go with it all! I want to use that chevron on everything now!


You can find all the goodness in her shop right here.

Today, I also have a post over at the Craft Warehouse blog! I created these fun party supplies simple enough for your kids to do! In fact, I loved the treat containers so much that I created them for my son's class Valentine's. They turned out cute since he made them all. Super simple and quick to do!


I also loved the way these socks turned out that we created the same thing for his teachers. Socks are super inexpensive if you buy them in a set. I love them so much, I might want to make some more for some friends and family. ;)


Create Well: Create simple but heartfelt projects to show how much you care.

Heidi Swapp - Girls Night Out

Now that my stomach is full and Thanksgiving is over, bring on December! It has been a whirlwind of a month, including celebrating my birthday three times!!! I love my family! ;) Actually, my twin sister, Becca, and I were able to celebrate in Portland with dinner. It was lovely. She gave me a "night out with the girls" which was scheduled for last weekend at Create a Memory, downtown Salem with my sister, Becca, and her sister-in-law and my friend, Sarah.


Becca kept reminding me to be prepared to think about what I wanted to create before going into the shop. I decided on using Heidi Swapp's digital word files with the Silhouette and vinyl. That way I could use the word as a template/mask on a mug.


I painted the base coat a yellow, including the inside of the mug!


Then, I went to stick the vinyl on the mug after the paint dried. But, the paint is kind of powder-like and it wouldn't stick. I was told by the owner of the shop that contact paper works better. (Now I want to find out if contact paper can go in the Silhouette.) After painting the base coat, I could of gone over the entire front of the mug with a different paint and peeled up the word mask. Since the vinyl didn't stick, I used it for a stencil and traced around the "believe." Then, I took a turquoise paint to fill it in.


Of course in between coats we were taking photo with our phones. ha!


I had the mug two days later and it looks great! I totally want to go again and try the original technique that was in my head and see the difference. Hey, but not too bad for my first try. Plus, I had the owner of the shop very interested in what a "Silhouette" was. ;)

Create Well: Try hybrid with other crafting - like ceramics.

How to Add Digital Words to Your Digital Photos in Five Easy Steps

I remember about four years ago wishing that there were more tutorials out there that explained digital scrapbooking. I was almost in tears wanting to learn and wishing every tutorial explained it in layman's terms. ;) Cause, I didn't speak "techy."


If you are just starting to play with digital elements, the easiest thing to learn is how to add words to your photos. It will teach you "layering" which will be your first "techy" word to add to your new digital vocabulary. ;)

The supplies you will need are:

1. Adobe Photoshop

I use Adobe Photoshop CS5, but you can use a later version or Photoshop Elements too.

2. A digital photo.

I am using this one of me in a patch of weeds. (Hey, anything looks good when you make it black and white.)


3. Digital Word Kit


I am using Heidi Swapp's Gratitude Word & Quote Kit. You can purchase and download it on her website here.

Simple instructions:

1. Open your photo in Photoshop,  by right clicking your photo, hoovering your mouse over "Open With" and clicking on "Photoshop."

You will see something similar to the following:


Now, don't worry if your screen looks a little different. Depending on what Photoshop you may have it will look slightly different. For what we are doing today, the idea is the same across all programs.

2. Now, go to your folder where you downloaded your Heidi Swapp words.

I will take this time to tell you to put all your digital items in one folder on your computer. Store them inside this folder in simple categories to help you stay organized. You can see how I have organized my categories below. I wish someone told me this when I first started downloading items. ;)


I have folders like: PS Actions, Ali [Edwards] Brushes, Blog Bling, Calendars, Christmas, Frames, and Kits. "Kits" is where I store digital scrapbooking collections by artist.


Inside my "Kits" folder, I have a sub-folder of each artist and then inside that folder are the items I downloaded.

Now, "Why stay so organized," you ask? Well, as you start collecting product, you will need a way to find it easily. Also, this one folder of digital items can now be dragged to an external hard drive.

Believe me when I say you WILL want to back these files up. Just take my word for it. When my laptop fried and all my digital files were on that baby, I was extremely happy I backed everything up on discs and even made sure to get an external hard drive after that episode. ;)

Open the file you have stored your Gratitude Quotes and drag it to Photoshop.


Dragging it instead of right clicking on it will put it on the project you are working on (in this case the photo).


3. If you have a box around your quote, like I do above, you will want to adjust the size of the quote so it isn't so large.

(If you don't have a box yet, at the top of your screen click on Edit_Free Transform. Or, the short cut is Ctrl+T. I use shortcuts when possible. Note: Some Elements short cuts are different than CS short cuts)

Holding the SHIFT key use your mouse to click the edge of the square around your quote and you can adjust the size of the quote to fit on your photo. Holding the shift key will keep your image from getting distorted as you resize it. When it is the size you like, let go of the SHIFT key.

Click on the quote and move it to the spot you would like it on your photo.

I am not going to get into changing the color of the word today. If you want to do that, you can find some helpful tips at Designer Digitals.


4. Before saving your image, you need to "flatten" your layers. (Hey, there is your first digi "techy" word!) If you don't your image will not be crisp and clear but blurry.

Here is where you can see all the layers you have created so far. If your "Layers" tab is not open click on it.

 
All those "layers" need to be flattened. To do that, click on Layer_Flatten Image, as seen below.
 

When you do so, you can now see that the "layers" on the right of your screen are now one.

5. Now, it is time to save your image!


Click File_Save As. Always click Save As. You never want to accidentally override an original digital image. (When closing Photoshop if windows pop up that ask if you want to save your image. You already did, so do not save them again since it will be asking to save over the original image.)

Now you are finished! Can you believe it?! You just created your first "digital scrapbook page!" What?! Did you know that is really what you did? Just imagine doing the same thing with digital paper instead of a photo and digital embellishments instead of the quote? Then add your photo too and you have a digital scrapbook page!

Ok, maybe I am getting ahead of myself, but stay tuned in and I will help you get there!

Create Well: You can do digital. Try it.


Heidi Swapp - Beginning Digital Scrapbooking


I remember pulling my hair out, about five years ago, trying to figure out digital scrapbooking. I wanted to be able to create my own blog banners, scrapbook, and add quotes to my digital photos in Photoshop. I just couldn't understand it. It was through my tears, literally, that I prayed for God to "help me understand this Greek!" When I opened my eyes, I understood. I have to admit that it took a lot of practice, but now I love it! I have been asked to kindly explain it a little, so I thought a few encouraging blog posts were in order!

For those that are just starting to learn Photoshop or digital scrapbooking, I recommend starting small.

First, start learning by adding quotes to photographs.


Then, create something small like a blog banner or phone wall paper. When you finish you will feel like you have done something HUGE and you can enjoy the results for sometime.


Then, when you feel comfortable adding digital elements to a small canvas you can graduate to a 12x12 scrapbook page!


In the near future, I am going to show you how to create all of the above projects with Heidi Swapp's digital files! In the meantime, I would love to give you the above blog banner/phone wall paper for free!

To download your free blog banner and phone wall paper, click here!

Create Well: When learning digital scrapbooking, start with something small and rewarding! Then go and treat yourself to a latte! You deserve it!

Samantha Walker Design Team Blog Hop and Giveaway

It is time again for Samantha Walker's Creative Team Blog Hop and giveaway. Samantha Walker will be having a blog hop once a month where her Design Team will be sharing their creations with her brilliant products! If you are coming from the creative genius, Angi Barr welcome! If not, you can start the hop here. I am so excited about this because Spellbinders is again the sponsor for this month's give away! Read on to see which set and how to win.


Spring is a great time to be refreshed. The trees are starting to bloom; flower buds are showing; and the old is thrown away so the new can grow. It is this time of year that I go out into the garden and prune the branches of my shrubs or roses that have no new growth. If you don't cut the dead branches the nutrients try and feed those branches and the part of the plant that needs it the most doesn't get fed like it should. 

At 34, I am still reminding myself that I was created unique for a purpose. Last week I was able to spend the weekend at a creative retreat and I met other women - just like me. They all have a creative spirit and have to be artistic. 

It was during this time I was reminded that each of us could go with a little pruning in our lives so we can grow creatively. Here are five ways that help me stay focused so I do not burn out artistically.

1. Remove distractions from your life. 

This could be different for everyone, but, for me it is over commitment. There are times when I need to say no to doing that extra scrapbook for a family member, free of charge. ;) Big projects take time. So I limit my work load to what I can handle in only an hour or less.

2. Get connected.

There is nothing better than getting together with other women that craft. It could be an online Facebook group, scrap club, or even at a crop once a month. I found that if it is the right group, I come away refreshed and inspired.

3. Stay accountable. 

Find a friend that you can talk to or bounce ideas off of. Not only will they encourage your artistic gifts, but they will also understand. I talked with a fellow Design Team member via Skype a couple of weeks ago and I came away feeling loved! She just talked about the projects she was working on and I realized, as she was talking, that she thinks the same way I do. It is nice to have friends who "get you."

4. Challenge yourself.

Challenging yourself might mean you take a class or use product in a new way. For me, I challenged myself to use Samantha Walker's Orchard Harvest digital kit for a spring time "about me" layout.

You could also have a friend play "The Bossy Scrapper" with you. I just learned this game from a friend. She listed 10 items that all had to be on your page. Sometimes she gave a time limit, cause let's admit it, we do better with a deadline. ;)

5. Keep at it!

I am in my craft room at least once a week. When I am in a rut, I get inspired in places like Samantha's blog, Pinterest, designer's blogs, or magazines (my favorites are Flea Market Style Magazine, Better Homes and Gardens, Martha Stewart magazines, catalogs from Pottery Barn and Anthropologie).


To enter to win this Spellbinders Cukoo Clock die cut set,  just leave a comment on my blog between 12:00am April 11th and 11:59 pm April 15th, 2012. Winner will be announced on Samantha's Facebook page on Monday April 16th..

For additional entries to win:

1. Receive an additional entry for commenting on each of the other blogs in the blog hop.

2. Go here and follow Samantha Walker's blog.

3. Follow her on Facebook.

4. Sign up for an e-mail subscription to Samantha's blog and you will automatically receive a link to a free SVG cutting file that you can download and use on your personal electronic cutter. Link will be e-mailed early next week.

To receive the additional entries, and get the link to the free SVG file, mention in your comment on Samantha's blog that you have done so!  (If you are already signed up, you need to give us the first part of your e-mail address that is on the subscribe list…so that we can find it and send you the SVG.)
WOW, that is 13 chances to win!


Samantha Walker Blog Hop - Love Is In The Air

Yeah! It is Valentine's Week here at Create Well, Create Often and to start the inspiration off is Samantha Walker's Creative Team Blog Hop and giveaway! Samantha Walker will be having a blog hop once a month where her Design Team will be sharing their creations with her brilliant products! If you are coming from the artistically famous Angi Barrs, welcome! If not, you can start the hop here. I am so excited about this because Spellbinders is the sponsor for this month's give away! Read on to see which set and how to win.

Let me just tell you, I am starting to like card making. It is growing on me. But, I have to be honest. Valentine's Day has been haunting me. Since Christmas ended, Pinterest and every online paper crafter's website has been advertising for the holiday. Valentine's Day is a card maker's dream. Card makers probably fall asleep counting red and pink hearts, dreaming of what Valentine they will create the following day.

For me, I have created probably the same amount of cards, just none I would be willing to give away to anyone I know and defiantly not good enough to share with you today. ;) I am a mother with a four year old that has to have a collection of cards for class, Sunday School, family, and teachers. I am getting anxious just typing about it.

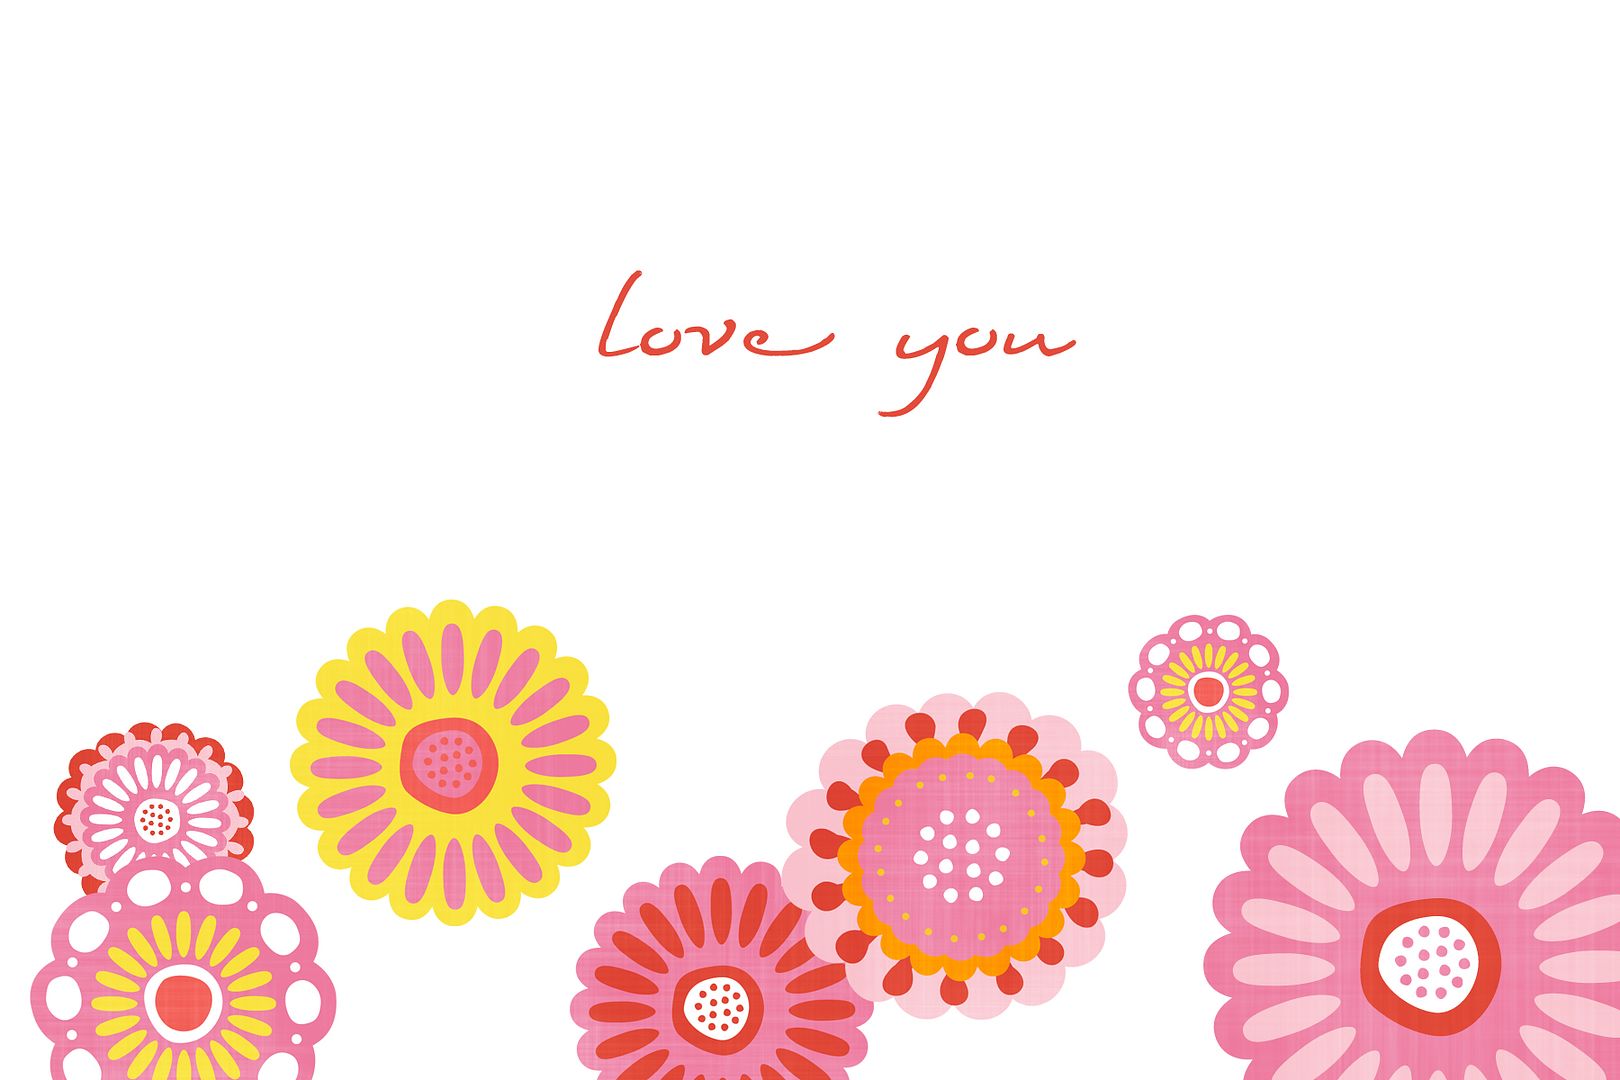
So, this year, I have decided to end my misery and create digital Valentines. This is an easy way to create a handmade card. But, it saves time by having it printed at your local printers as a 4x6 or even as a postcard. If you print it as a postcard, you can have your child sign and add a treat to the back.


This first digital card is of my little man... I liked making the photo the focal point of the card and felt like I could still use "reds and pinks" without making it too feminine. I used The Cuckoo 4 U Strawberry Love Digital Paper Pack. 


I also created a clean and more universal card that I can give away. I made a copy of the card so that I can change out the sentiment. It can read, "missing you", "hello", or of course "Happy Valentine's Day".

To create the card in Photoshop -

1. Open a new document 6x4, white background, and 300dpi. 

2. Drag the flowers from the Cuckoo 4 U Strawberry Love Flowers Digital Embellishment Kit to your 6x4 project in Photoshop. 

3. Click on each layer (on the sidebar it will list each flower as a different layer). Move each flower where you would like it to go. 

4. To adjust the size of the flower, click on "Edit" then use the drop down menu to click on "Transform" and then "Free Transform." Or for Adobe Photoshop CS2-5 use Ctrl+T. Make sure before you start changing the size to hold the shift button and you adjust. That way it doesn't distort the image.

This is a great way to start learning how to digital scrapbook. Try out a few 4x6 cards before jumping into making a 12x12 page.

How easy was that? Easy enough that I am going to be sleeping like a baby this week while every other card maker will still be having visions of red and pink hearts dancing in their heads. ;)

Now how about that giveaway?!  A big thanks to Spellbinders for giving away the popular Blossom and Tags Accent Set by Samantha Walker!


To enter, just leave a comment on my blog between February 8th and February 12th. Winner will be announced on Samantha's Facebook page on Monday February 13th. 

For additional entries:
1. Receive an additional entry for commenting on each of the other blogs in the blog hop. 
2. Go here and follow Samantha Walker's blog 
3. Follow her on Facebook

4. Sign up for an e-mail subscription to Samantha's blog and you will automatically receive a link to a free SVG cutting file that you can download and use on your personal electronic cutter. Link will be e-mailed early next week.
To receive the additional entries, and get the link to the free SVG file, mention in your comment on Samantha's blog that you have done so! 

WOW, that is 13 chances to win!

 
To continue the blog hop, go to the talented Jamie Cripps' blog, Bits of Paper. By the way, she IS a cardmaker, and a very good one at that. So prepared to be amazed and inspired by her skills. (PS, I wonder if she dreams of red and pink SVG hearts instead?)

Create Well: Use your digital skills to create your Valentines this year so that you can sit back and smell the roses. ;)

Samantha Walker - New Beginnings Blog Hop

Welcome to the first Samantha Walker Blog Hop of 2012! If you found me from Angi Barrs' blog I am so happy to have you here! Samantha Walker will be having a blog hop once a month where her Design Team will be sharing their creations with her brilliant products! You can start the hop here.

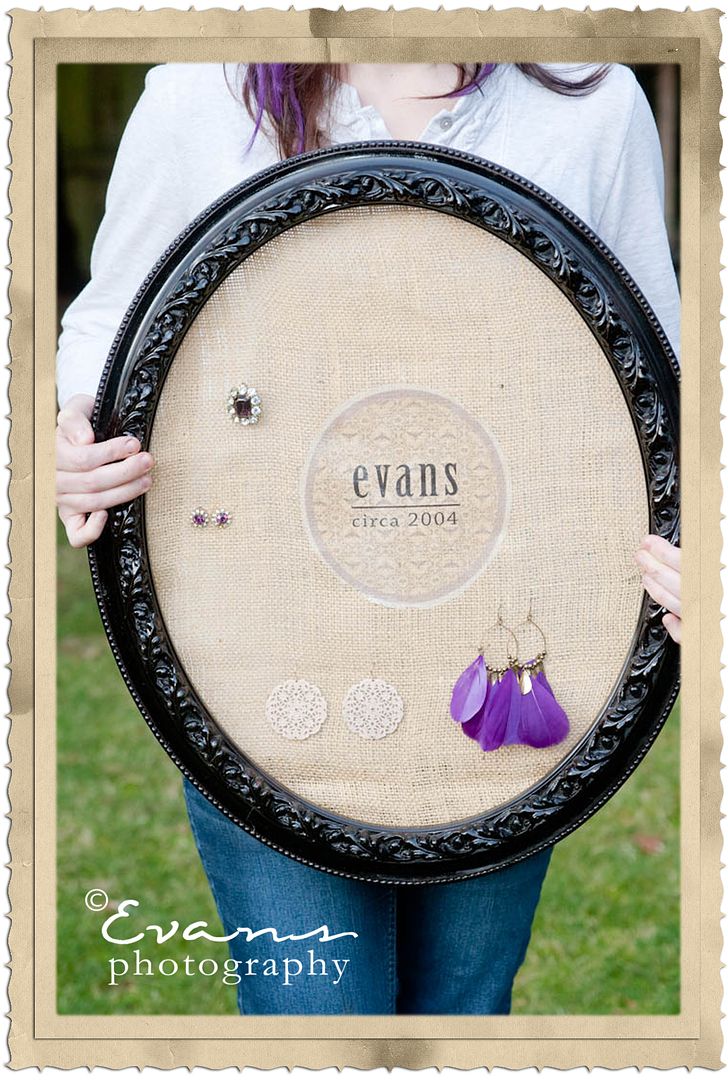
This month, I have two burlap hybrid projects to show! The first one is this re-purposed frame into an earring holder. For Christmas, I got these great feather earrings from Forever 21 (thanks Mum!). They go great with my purple hair extensions. ;) I think it is so funny that I spent an afternoon making this for my $4 earrings. Ha!


To create the frame follow these instructions:

1. Find a frame at a thrift store or re-purpose one like I have done. Remove the glass and back. Spray paint it the color of your choice. I used black for a classic look.

2. Next open Photoshop and create a new project by clicking on File, then New. Make your project 8.5 x 11 inches. Use 300 resolution on a white background and click on OK.

3. If you are new to Photoshop, find the tool bar and put your cursor over the tools. Find the Ellipse tool. Click on it. Then find the circle (or oval shape) and click on it. Then, on your document click and drag your mouse to create a circle. I made mine large enough to fit in the file leaving the edges clear. Make enough room for step 4.

4. Do this again to make a "mat" around your first circle.

5. Open your file of digital pattern paper. Drag the paper you wish to use for the mat into Photoshop. I used the Circle Grey paper from  Samantha Walker's Honey Golden Sunlight Paper Pack. Then you want to make sure this layer is large enough to fit in the circle. On the right, you will see a list of your layers. Click on the paper layer you just added. Drag it to go above your mat layer. Then, on the top of your screen you will see "Layer" click the drop down menu and click on "Release Clipping Mask" (or short key for Photoshop CS2 Ctrl+Alt+G). This will make your gray paper into the mat.

6. Do step five again with the center circle this time. I used the Honey Comb from the same pack. It is vintage-chic with the bees on it!


7. On your tool bar you have a text tool. Click on it and then click again on your project. Find a font you like and begin typing. I used the year my husband and I were married. I wanted it to be something my husband could stand to look at. ;) A quote would work well too.

8. Save the project as a Photoshop document (Click Save As and then to your computer). I also saved it at as a JPEG by clicking Save As, JPEG, and then to my computer at 12, the highest quality image.

9. Next use a t-shirt printer transfer. I got mine at my local craft store. I followed the instructions on the package. It has an online program to reverse the image which I did. I then printed the image on the transfer paper.

10. According to the transfer's instructions, iron it to the burlap. Make sure the edges are all done. Burlap is a hard surface to iron to, so go slow in removing the backing.

11. Using a staple gun, staple the back of the burlap to the frame starting with the top then going to the bottom, side, to side, and then filling in the gaps.

12. Cut the excess burlap off and hang!


Here is another burlap project using the Harvest Moon Mega Pack. I love how many elements are in this kit. There are many you can use anytime of year! This digital frame was used with a quote this time (inspired from Pinterest). It is easier to make since you don't need to create any shapes using a digital frame.

"We are constantly invited to be what we are." - Henry David Thoreau

To be entered to win a $10 gift certificate to use in Samantha Walker's digital store and a can of Preserve Your Memories II Acrylic Spray care of Preserve Your Memories, make sure to leave a comment on my blog. One random winner will be picked from all the comments left on the design team members' blogs. To help increase your chance of winning, make sure to follow Samantha's blog or facebook page. Then, comment again letting us know you have! (Note: Shipping for the Acrylic Spray is only available in the US due to mailing aerosol restrictions.)

Click on the link below to go on to the next team member's blog to see what they've created!


Create Well: Use burlap and iron-on transfers to create a home decor piece you would be proud of!

Create Well Sponsor - My Memories Digital Scrapbooking

I don't know how many times I have just wanted to quickly get a layout done digitally. Photoshop can be just as time consuming as a paper layout sometimes. Our sponsor for this month is My Memories Digital Scrapbooking. I was shocked at how easy it was to create with their digital scrapbooking software, My Memories Suite, especially the first time! This is a program that you can use if you don't own Photoshop. It is perfect for the new digital scrapbooker or one who may want to save time too.

I was sure that with my style being unique, that I wouldn't find embellishments or titles that would suit me. Boy, was I wrong! Their product that comes with the software is classy. Also, you can go to their store and purchase kits for the software just like any other digital scrapbooking store.

Here is the first layout I created and it only took me twenty minutes (that is including the time it took me to learn the program and looking at all the goodies it came with!).


Just for Create Often readers, My Memories is giving $10 off the software. Copy and paste the code STMMMS44496 to receive $10 off your My Memories Suite v2 purchase (which will make it only $29.97!). Go here to find the software.

In addition, My Memories is also giving a copy of their software, My Memories Suite v2 away! All you need to do is to go to their website and come back to comment and tell me what is your favorite kit is! You can also have another chance to win if you like them on Facebook! Just make sure you come back and comment that you have liked them on Facebook to get the extra entry to win! Also, you can find another promo code on Facebook that you might want to use in their store too! ;)

Create Well: Save some time. Create digitally.

Need a Blog Makeover?

Everyone's blog deserves some creative love! If you are interested in a blogger blog makeover email me at createoften(at)gmail(dot)com to ask about affordable $25, $35, and $50 rates!

Here are a few of the blogs I have designed that are public...

Create Well, Create Often

Molly Mo's Antiques

People's Church Women's Ministries

My Life in a Nutshell

Daily Grind Designs

Teach Often

Declare That Which is Profitable

Take Note Simple Design

Guest Designer - Anna Dabrowska - Pekocka

This week I have a treat for all of you! I have several guest designers willing to share what makes them "create well" with us. So, keep tuned in this week to be totally inspired! Finn will start us off with her brilliant whimsy and artistic style. Finn designs for The Color Room, Creative Therapy, Scrapki.Pl, Lemonade Scrapbooking, and Tattered Angels.


My name is Anna Dabrowska - Pekocka, but on the net I tend to use my nickname – Finnabair or Finn to make it shorter. I’m 30 at the moment, working full time in a local Cultural Center as a teacher, PR worker and many many more in one ;) I live in Warsaw, Poland, with my dear, supportive husband – Jedrek, who understands my passion. I love photos, new challenges in my life and a cup of black tea somewhere nearby;)

How did my adventure start? I've tried several techniques - like decoupage - but at the end of 2007 I found information about scrapbooking and in 2008 I made my first pieces – I fell in love. Next step was trying some altered art and mixed media - and my love got even deeper! Now I'm totally addicted - especially to layouts.

How would you describe your scrapbooking style? What makes your style your own?

My style... I'm not sure if we can name it a “style” but I'm a totally moody scraper. I create different layouts starting with grungy, eclectic through eclectic and freestyle and finishing on detailed mixed-media canvases and altered projects. It all depends on my current mood or source of inspiration. If I have to say which things are typical for my projects I'd say it is using of different medias – Glimmer Mists, gesso, gel mediums, inks combined with machine stitching. I'm love with found objects, specially metal ones and I usually incorporate them into my creations and I prefer making my own, custom background for the page.


What inspires you to be creative?

My inspiration is everywhere: I love to collect everyday object and than giving them “the second chance” somewhere on my canvases or paper layouts – their textures, shapes, colors are an endless source of inspiration. I think I am creative just because it is may way of life, I can't stop thinking about creating, even when I'm tired there are some ideas coming to my mind. I just don't stop it and let it happen:) If you let yourself to have fun, look at the world with your eyes wide open – there's no other possibility – you have to be creative:)


Who are your favorite scrapbook designers and why?

I'm not sure if I can really name my favorite designers. I watch lots of people creating, I follow many blogs, but to be honest – I'm more inspired by single projects than the whole blog or gallery content. If you had asked me this question a year ago I'd probably said that I love Tim Holtz, but now my horizons are much wider and I could name many people who amaze me with their ideas and skills. I've got a very long blog list to read and I try to visit them all although it is impossible.


What are your favorite color combinations to design with right now?

That is one thing that is not changing in my project – I love black and white set of colors. They are always my base, start for adding more – sometimes it is only one color, sometimes a full palette, but I prefer monochromatic projects.


What is your creative process?

My creative process usually starts with the idea coming to my mind – sometimes it is a full project, ready to convert it into a page or canvas and sometimes it is just a small “flash” of the technique or embellishment I'd like to use. Usually when I know I should use a particular color set or material I keep “processing” the image in my head as long as I need to make sure I am ready to start. The final effects are sometimes a big surprise though – usually a nice one. It is because something “happens” on the way which changes the project - it may be an accident, a thought or a next inspiration coming. Sometimes I need really a long time to finish the creation I kept in my mind – the idea may wait months for the realization.


What is your story that you are trying to tell? How can this inspire others?

There are many different stories behind my works: as I said before I am a moody artist and scraper so most of the time the creations are the impressions of that I feel at the moment or visualizations of some memories, ideas and plans. I hope people watching them can see that creating is fun for me, it is a way of expressing myself and giving a piece of my heart to others. I think the need, the feeling is the best reason for creating and as long as you feel pleasure doing this it means it is all as it should be.


How can you inspire others to "create well"?

Being creative is a decision, a way of life - make sure it is really important and fun for you. If you are true to yourself, if you create in they way you feel - then it will have the biggest value both for you and for the others. Just be yourself – it is the only possibility to create well – and often :)


You can see more of Finn's work on her blog and follow her on Facebook.

Create Well: Just be yourself!

Pencil Lines - A Vintage Holiday

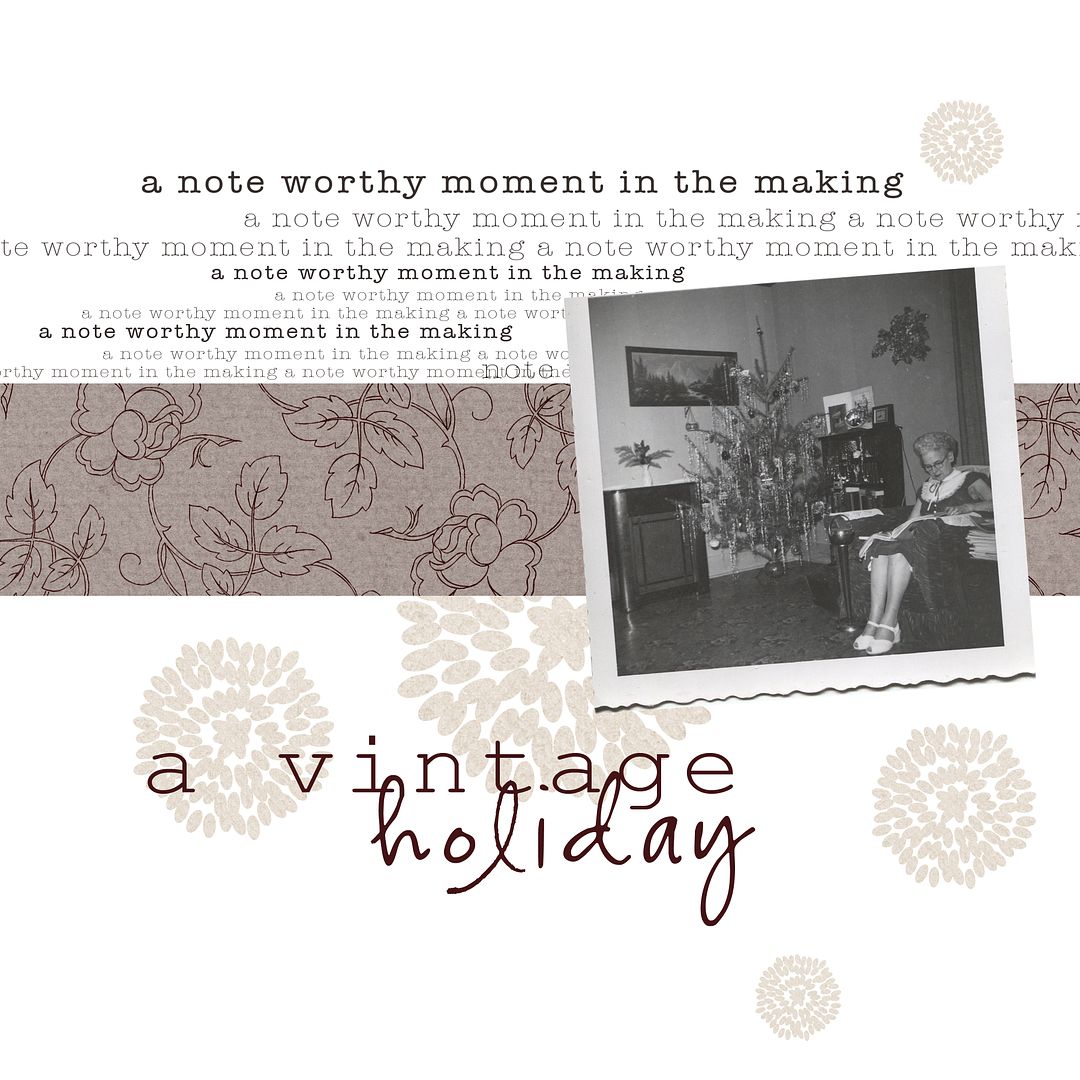
Do you have any photos that you don't have the story behind them? My family have many vintage photos where the stories behind them are lost. This photo is one of them. The memories behind it have to do with Grace sitting in her favorite chair. But, my favorite part of the photo is the Christmas tree although the memories of this Christmas is lost. It's sort of sad, really. But, it is beautiful to document even a little bit of what we know now before anymore of our family history is lost.

Create Well: Document what you love about a photo even though the story behind the photo may be lost.