Planners

Planners
Planners

Scrapbooking

Scrapbooking
Scrapbooking

Party

Party
Party
Showing posts with label stamping. Show all posts

Rotating Design Board 5 Ways

Totally-Tiffany Rotating Design Board 5 Ways by @createoften

I love meeting a tool where I ask the question, "Where have you been all my life?!" Totally-Tiffany has done it again with the Rotating Design Board. Just imagine a clipboard that has evolved into a "Lazy Susan" to use for crafting and in the office! It is genius and I have listed my favorite 5 ways I am using it!

Donut Eraser Valentines with Free Printable

Donut Valentine's Day party ideas and cards perfect for the classroom or at home by @createoften for @heidiswapp

When I saw these fun Amy Tangerine donut erasers, I knew they would make the cutest Valentine's Day cards! Here is the easy how-to along with the free printable so you can make them yourself!


Foil Your Stamps with the Minc

Foil your stamps with the @heidiswapp Minc by @createoften

I am so excited that Heidi Swapp's Minc Team Class Series is now live at Big Picture Classes! My lesson about foiling your stamped images is finally live! I wanted to share with you the story behind how I learned how to do this...

Heidi Swapp - Home Sweet Home

Home Sweet Home @heidiswapp @createoften #heidiswapp #unitystampco #hsMarqueeLove #hsMemoryPlanner

So my sister in law recently moved. It was that same week that I got my Unity Stamp of the Week!  I was so excited that I could use it for some snail mail. It's always fun living in a new home and getting mail for the first time, don't you think so?

I really had a good time coloring in the stamp and adding a little watercolor base. Then, I backed it with beautiful Bazzill Basics Paper cardstock. Then I layered it on Heidi Swapp Hello Beautiful papers from the 12x12 paper pad. It matched perfectly.

I also embraced my inner fear of glitter by using Heidi's Marquee Love glitter tape. You know what? I have been missing my lint brush for a month and I found it just in time! The only thing is - I didn't need it! This glitter tape doesn't shed like I thought it would!

Now, it's time to pop this thing in the mail and make someone's day!

Create Well: Add a pop of bling with glitter tape and make someone's day!

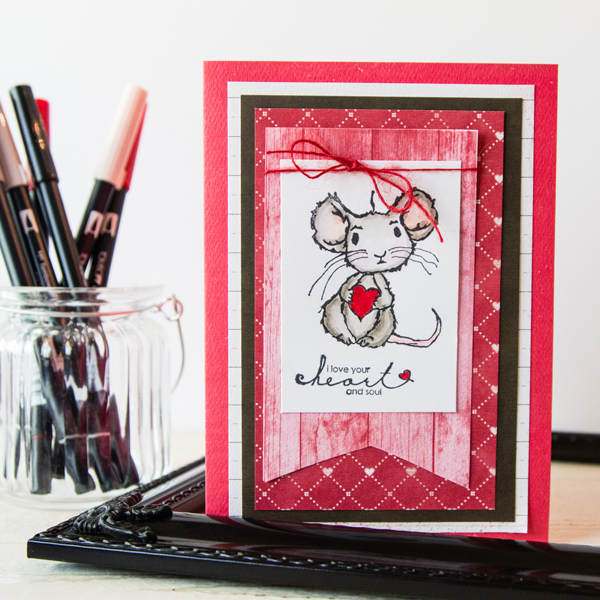
Craft Warehouse and Unity Stamp Company - I Love Your Heart and Soul

I Love Your Heart and Soul @createoften #unitystampco #stamp #diy #card #stampoftheweek

My sister gave me such a great Christmas present. She signed me up for the Unity Stamp Company Stamp of the Week Club. So, it has been like Christmas every week since the first week of December. I love opening up my package for a surprise. The deal was that if she was to do this that I couldn't sneak on to the site to see what the stamp of the week was going to be. I think that's fair.

This little guy is so sweet and the sentiment can be used over and over again. I chose to use the exclusive Authentique Two Valentines 12x12 paper pad! Really, there are so many universal patterns in this pack that I could use for so many other projects other than a holiday!

I can't wait to show you some more of the stamps I have added to my collection these last few months!

Create Well: Good surprises can come in small packages.

Heidi Swapp - World Card Making Day!


Happy World Card Making Day! You know, it wasn't until I started working with Heidi Swapp's products did I fall in love with card making. I dreaded making a card years ago. Since then, I have found what makes a great card is the joy of the person making it.


Happy thoughts make happy cards. Happy cards make happy recipients.


My twin sister is quite the card maker. In fact, this is her holiday ;) She makes cards that make me fall in love with stamping, small details, or embossing all over again. I am always excited to get one of her cards as a gift. I feel special when I get it in the mail.

That's how it should be for everyone that gets a handmade card. They should feel special.


This card was made with Heidi Swapp's new September Skies collection now in independent scrapbook and online stores! I love the sentiment stamp from the new collection and built the card around it. I had to add this Lawn Fawn bear, from the Love You S'more Set, to the card because he is just so darling. I also customized him with his little heart.

When my son saw him, the first thing he said was, "Ahhhhh!" Mission accomplished.

Join me and the rest of the Heidi Swapp Media team with more card inspiration on Instagram! Start right here at Heidi's feed!

Create Well: Happy thoughts make happy cards. Happy cards make happy recipients.

Craft Warehouse - Lawn Fawn S'more Favors

Lawn Fawn Smore Favors @craftsavvy @createoften #diy #party #favors #smores #glamping

When I sent my husband to get chocolate for my daughter's birthday party he came back with a "pound brick"! How was I to make s'more favors with that? Well, let me tell you - carefully and with a chef knife. After the mess of cutting the squares they turned out pretty cute.

I have the directions on the Craft Warehouse blog today!

Create Well: When making s'more favors always forgive yourself for sneaking a few bites for yourself.

dear lizzy's lucky charm


When given the challenge to make some simple but fun cards for Craft Warehouse, using Dear Lizzy's Lucky Charm Collection for American Crafts, I knew I wanted to use these darling jars and quotes from the Card Stock Die Cut Pack.

To save paper, I used a pre-made 5x7 card and cut the following from the 12x12 paper pack:

Pink Paper - 1 1/2" x 5 1/2"
Pink Floral - 3 1/2" x 5 1/2"
Navy Floral - 5" x 1 1/2"

After gluing my papers in place, I used pop up dots to add lift to the Card Stock  Quote and Jar Die Cuts. Using the gold DIY Twine by Crate Paper, I tied a bow around the top of the jar. Of course I had to use the "Love You" stamp from the Lucky Charm Clear Acrylic Stamp Set and make a little tag from left over scrap paper from the collection. I just placed glue on the bag of the tiny tag and tucked the top under my bow so it looked like it was hanging in place. 

Create Well: Making cards can be quick and simple with Lucky Charm!

Valentine's Day Inspiration

Have you noticed my new look for the month? Oh yeah, Heidi Swapp has some new digi items in her shop and I got a chance to play with them yesterday! Seriously, they are awesome! I mean, how much fun would it be just to print them out and give them away with a little bit of ribbon added?


These are glittered and what I used in my banner. I love glitter that doesn't rub off on to my hands! ;)


These are perfect for your Silhouette. I am SOOO cutting some of these bad boys out!


And if that wasn't enough, she also has new digi papers that go with it all! I want to use that chevron on everything now!


You can find all the goodness in her shop right here.

Today, I also have a post over at the Craft Warehouse blog! I created these fun party supplies simple enough for your kids to do! In fact, I loved the treat containers so much that I created them for my son's class Valentine's. They turned out cute since he made them all. Super simple and quick to do!


I also loved the way these socks turned out that we created the same thing for his teachers. Socks are super inexpensive if you buy them in a set. I love them so much, I might want to make some more for some friends and family. ;)


Create Well: Create simple but heartfelt projects to show how much you care.

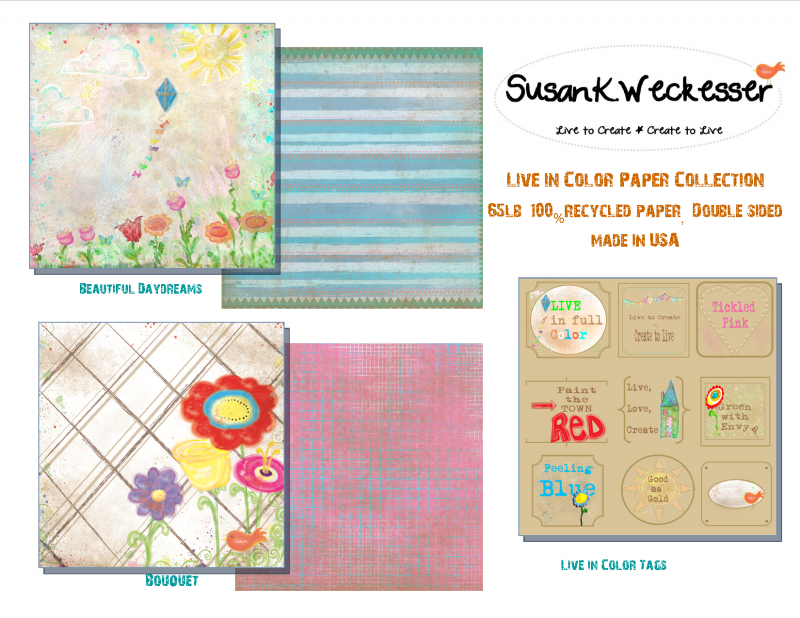
Scrapbooking with Helmar, Susan Weckesser, and Unity Stamp Company


Helmar is so blessed to have Susan as a part of their design team. She is such a talented artist and she has shared her talent with the rest of the crafting community by releasing new stamps with Unity Stamp Company! I was blessed by receiving Susan's ABC. 1, 2, 3. Washi, and A Little Grundge Love sets.


I love Susan's papers; they are described as whimsical. I would say that describes them perfectly.


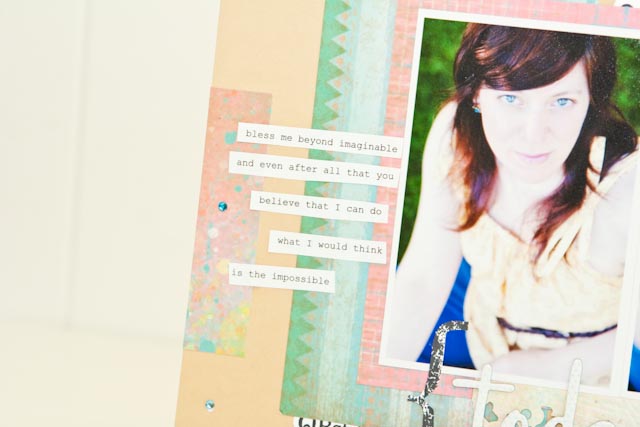
There are so many ways to use these stamps with these papers, but I wanted to showcase them on a scrapbook layout.


These papers are made from 100% recycled paper. I was so surprised at the thickness of them. They feel like cardstock. So, I used it as the base of my layout, knowing it was going to be able to hold all of my layers.


1. I first threw some Mister Huey's Mist on the page. The paper didn't warp at all with the amount of paint on the page. I regret now adding a little more pink and blue in there. ;)

2. I started to add my base papers and then photos with Helmar's Premium Craft Glue. I love this glue because it also doesn't warp my paper or photos and has a good bond.


3. I then stamped Susan's ABC. 1, 2, 3. Washi, and A Little Grundge Love sets on white cardstock with Versafine Black Ink. This ink gives such a clear and crisp image. Cutting the alphabet stamped image in half, I glued them into place.

Both the brackets in the A Little Grundge Love set are different. You can see on my layout that one has a cracked look and the other a painted look. I liked both of them as they were and placed both on the page.


The washi tape stamp is going to be very popular! I love it! I can imagine adding it to masking tape or stamping it in all the bright colors of the rainbow!

4. I then used a diecut to make a "watercolored" doily from Susan's paper. I LOVE this! It looks like I really watercolored a doily! Super cute!

5. After gluing down all my elements, I added my title and colored in the letters with a blue Sharpie.


6. Lastly, I used Helmar's 450 Quick Dry to add my rhinestones ensuring they stay in place for good.


Make sure you take advantage of this special offer, all Susan Weckesser Stamps are 35% off! Stay tuned into the Helmar blog and the Unity Stamp Company's blog for even more inspiration!

Helmar - Faith Canvas


I was almost in tears of excitement using Faber Castell's products this week on a mini canvas board. I love creating these because afterwards it easily fits into a frame by removing the glass. Then can get hung on right on the wall. Easy art!
Faith-1
This photo was taken by my sister of her mother-in-law. It had the perfect contrast for the bright colors that only Faber Castell can create in a mixed media project.

The layering process was so easy. The first layer was applied with Helmar's Decoupage and Craft Paste and paper (paper designed by Debee Ruiz from Me and My Big Ideas).
(Note: I only applied Helmar's Decoupage and Craft Paste to the board. I did not use a layer on top of the paper.)

It was super cold outside and too dark that I cut the paint splatter out of paper and glued it on instead of using the usual paint can this time. Ha!

I sped up the drying process with my heat gun...

I added a little white wash with white acrylic paint, water, and a paint brush so the colors of the Gelato would stand out more.

Faith-2
I then started applying the brillant products from Faber Castell.

I laid a circle stencil down over the paper and used the orange Gelato from the Mix and Match Mixed Media Sampler, then colored in random circles.I used a small paint brush and with a little water on it, I wet the circles. I made sure to use the heat gun to set it before the next step.

Faith-4

I repeated the same thing but used the PITT Artist Pen Big Brush in Dark Naples (deep yellow). I did a couple circles in the Turquoise Metallic Gelato for a little contrast. I again added a little water with a paint brush to blend in the color. I then used the heat gun before starting the next step.
Adding a little shading between the circles I drew with the Pink Gelato right onto the canvas. Using a clean wet small paint brush I blended it into the paper slightly. I then used the heat gun to dry it before the next step.

I loved it so much but wanted to tone down the yellow by shading it in with the matching Pastel Pencil. Then, I did a little outline on the outside of some circles with the PITT Artist Pens in Orange Glaze 113 and Deep Scarlet Red 219 (which are fine point drawing pens).

Faith-3

I then started adding my photo, border, and scraps for the journaling. I then stamped the script sentiment with black Stazon ink.

Faith-5

I used the Black 199 PITT Artist Pen Big Brush and actually wrote the title "Faith" right over the photo. I was shocked at how dark and vibrant the black was. It had no problem gliding across the photograph.

I have tried this technique with paint and really disliked the look of my handwriting using a paint brush. Using this Big Brush gave the affect that I wrote it with paint but it is so much easier to control. I was so pleased with it that I will be doing this more often on my mixed media projects and scrapbooking layouts! Plus, it is Indian ink which is why it is such a vibrant color - perfect for mixed media.

Knowing how beautiful the black dried, I went ahead and colored back in some of the paper's spray paint that was white washed. It really looks like I sprayed several layers of paint, when all I did was color dots in. ;)

Afterwards, spray the canvas with Helmar's NEW Crystal Kote Matte Fixative, to protect the project and make sure the beautiful colors STAY beautiful!

Faith-6

Create Well: Try to layer different products in a new way on your next project.

Charmed, I'm Sure


 How easy is this project?!

Use Stazon ink to stamp an image on white shrink film. The more detailed stamp you use the better. Then, punch with a large circle punch (it will shrink half it's size). Punch a hole at the top.

Put your circle in a container, I use a Rubbermaid dish washing bucket. Then use your heat embossing gun to heat the circle (keep the heat gun moving so it doesn't burn your project). It will shrink before your eyes. If it needs flattening, use a spatula before it cools. Add a jump ring and dog chain.

I will be keeping these for gift toppers this Christmas! I also like to keep little gifts in my purse for those random acts of kindness for the season. {I love it}...

Create Well: It never hurt anyone to get a head start. ;)

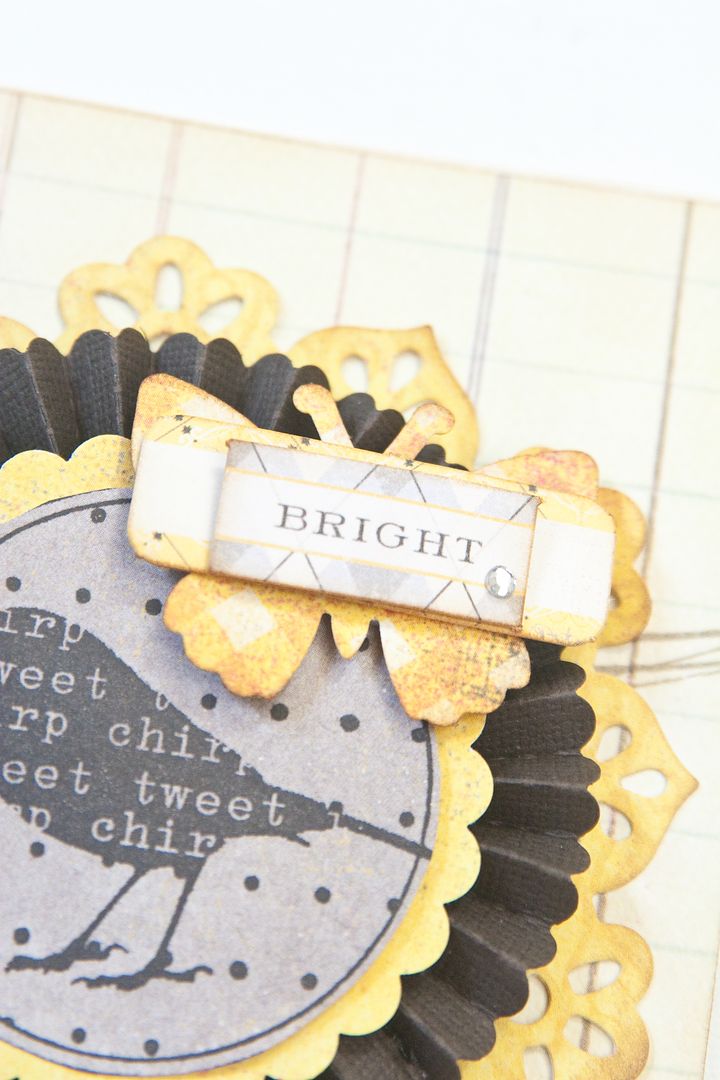
Craft Warehouse - Bright Card


I have never been a card maker. I felt like that my sister was the card maker and if I ever wanted one made, I could go to her. Ha! Plus, the space to create a card is so small. I am afraid of small spaces. You know, cards fall in the same category as walk in closets, closed doors, small  and crowded aisles in the grocery store.

It seemed like this Unity stamp was made for me, though. It is a circle. I thought, "I can handle a circle. Circles are friendly..." ;) Ok, all kidding aside, I loved making this simple clean card. I loved it so much that I made twelve cards this weekend! {My sister is going to fall out of her chair when she hears that!} I actually loved it too.  Isn't that what it's all about?


This card was for Craft Warehouse, using Authentiques debut line. Their product was such a hit in our local Craft Warehouse that it is almost sold out within two weeks! I have two more projects with this paper to share with you, so stay tuned in this week to see them!

Create Well: Art isn't what defines you. Art is what brings you joy when you define it. 

A Beautiful Day!

Well, today started out wonderful! I ate breakfast reading today's 12 Tags of Christmas and I found out that I won one of the prizes given away today! Talk about super excited; I mean there were 3317 comments on yesterday's post!! It just shows that you should always just try because you never know!

I was so inspired all week with all the distressing going on that when I got Craft Warehouse's fifth assignment I had to go and play. So, this morning I was able to finish most of what I started last night. I have just the title and some finishing touches so I will have to share it with you next week.

Becca and my brother in law, Josh, came over to take Ethan and I to town. It was a nice surprise and well needed since we have been home-bound for a week. Josh took us to a local scrapbook store that announced this week that they were closing their doors. So, we went and said our good-byes.

After lunch and the mall, we took Ethan to a local park and had him burn off all the energy he had stored up for the last week! It was cold but a good time. We met my husband afterwards on his way home from work and went home together as a family. What a blessed day!


Create Well: Fill your December with beautiful moments.

Classes at the Paper Zone: Holiday Charm

Registration for my class, Holiday Charm, has begun! I am taking this opportunity to teach my techniques on creating the acrylic charms and rings that you might have seen here or in our shop. The class is Saturday, December 5th from 12-2pm in Salem and the cost is $25 for six projects.


These charms are so universal! I created several items with them so that you could see how to use them. Personally, I am going to give many out as gifts this year. I love being able to give them as unique gifts but letting the receiver know that they can use the charm as a necklace after Christmas. The class will teach the techniques with Making Memories and Basic Gray papers with several different stamps and rubons to choose from. I love taking a class that teaches me how to create but lets me be free to make my project how I want. ;)


These are my samples for the display at the store. But, students can create theirs how they wish, or if they like do it exactly like mine. ;)

To register, call The Paper Zone at 503.364.9826.

Also, our holiday update at One Bright Spot has started! Check out the new items here!

A Faith Perspective Faith Blog Hop!

Welcome to Scrapbook News and Review Magazine's A Faith Perspective Thankful for Friends Faith Blog Hop. Today, we're out in force on the internet -- showing our faith and giving the glory to God! United, we stand as Christian paper crafters and blog owners to make a presence on the internet for all to see. We're celebrating the theme of friends and we're happy to share our projects with you based on the verse:

"Two are better than one, because they have a good return for their work: If one falls down, his friend can help him up. " Ecc4:9-10a

If you're just joining in on the fun, you can find the start of the train here: First, we would like to take a moment to thank our generous co-sponsors: Layers of Color Stamps, Gina K Designs Stamps, and Sweet ‘n Sassy Stamps. Together with Scrapbook News and Review Magazine, these companies have donated some wonderful prizes for today’s blog hop.

Prizes? Oh, yeah! There will be three lucky grand prize winners for today’s event.

To enter, simply hop to the blogs of all of the participating staff members of Scrapbook News and Review Magazine, take note of the staff member’s name, and leave a comment on their posts. Then send us an email at games@scrapbooknewsandreview.com listing each of the staff members who participated in today’s hop. It’s that easy. All entries must be received by Monday, November 16, 2009 at 12 noon, EST and three winners will be randomly chosen to win.

What are the prizes?

One $100 gift certificate from Layers of Color Stamps AND a 6 month subscription to Scrapbook News and Review Magazine.

One basket of goodies -- four stamp sets from Gina K Designs and a 6 month subscription to Scrapbook News and Review Magazine.

One set of digital stamps from Sweet ‘n Sassy Stamps and a 3 month subscription to Scrapbook News and Review Magazine.

In addition, every participating staff member of Scrapbook News and Review Magazine will offer a free one-month subscription to the magazine to one of their lucky visitors by simply leaving a comment on their blog. That's a lot of chances to win, so let’s get to the Hop!

I created this Christmas wall hanging with our sponsor Layers of Color's Regal Wings clear stamp. I love the look of this hanging that I could leave it up all year round! ;)


"Suddenly, the angel was joined by a vast host of others - praising God..." Luke 2:14 (NLT)


I used recycled clear packaging to stamp the wings on to. I used Staz-On ink on the wings and then sprayed with clear adhesive. I shook on a bit of white glitter to the adhesive.


I sewed ribbon on with my sewing machine.


A large thanks to Layers of Color for the chance to be a guest designer this month!

The next stop on this blog hop is Mary Demmons! Not only are her creations sweet but the music on her blog is my ultimate FAVORITE! ;)

Create Well: If one falls down, his friend can help him up.

Layers of Color Release Party and Blog Hop

Just a sneak peek of my project for the  Layers of Color stamp release party and blog hop beginning Saturday! There will be loads of prizes and freebies! I love parties. Actually, I love parties that I can go to in my pjs. ;) Make sure you stop by this weekend to join in the fun!


Create Well: It's my party and I'll wear my pjs if I want to...

Layers of Color: Peace on Earth

I am super excited for this weekend's release party over at Layers of Color. Make sure you join them for free goodies and loads of fun starting Saturday! I am included in a special blog hop this weekend, so make sure you come back to check it out too!


I created this brilliant little birdie for my Christmas tree. I used a bird I got at Craft Warehouse for $1! I then used this stamp from Layers of Color. I stamped 2 crowns, added rhinestones, and then sandwiched them together with a push pin and glue dot. I pushed the pin into his little head. Afterwards I added the dictionary script, and some little pearls.


I can't wait to add this to my Christmas tree!

Create Well: Think of unique ways to use your stamps for altered Christmas ornaments!