


Canvas done by my five year old
As a private preschool teacher for ten years and a Children's Ministry Director for six, my hands-on classroom was always a creative safe haven for children. My non traditional approach to teaching was usually looked at with mouths open and eye brows raised. See, I was the teacher that would be dressed in flippers, a shower cap, and a snorkel mask to greet the children as they filed into the classroom for our introduction to our ocean unit. It's not something you see every day. The real question is "Why not?"
Why not let children learn and express themselves freely in a safe, creative, fun filled environment?
As a stay at home mom, out of the classroom for two years, I use the same principles now as I did in the classroom. I would love to share a few ways to explore art with your child, perfect for teachers, homeschoolers, and parents.
1. Let the child experience art on their own.
It is common for an adult to see a child do an art project and want to "help" them out. If they are gluing something and it is a little crooked, leave it. It isn't art if every one's picture looks the same at the end of class! Let the child experience and explore creating. Let the child also hold the paint brush, glue their own pieces, and paste them on their own page. Not only do they learn from doing it themselves, but they also take ownership of their work, and experience more during the process.
2. Start giving your child art tools at a young age while being well supervised.
When your child can hold something in their "fist." It is a good time to start encouraging development of the muscles in their fingers. (This is called small motor skills). These muscles help hold a pencil. Great ways to encourage this is by giving the child glue (such as child safe Helmar's Acid Free Glue), scissors, and paint brushes to help develop these small motor skills.
Instead of giving a child a bottle of glue, use either a little paper plate or a recycled yogurt lid and squeeze a small amount on to it. Give the child Q-tips to dip and put on their project. This helps develop those small motors. Plus, some children are kinetic learners and have to squeeze the whole bottle out just to see what happens!
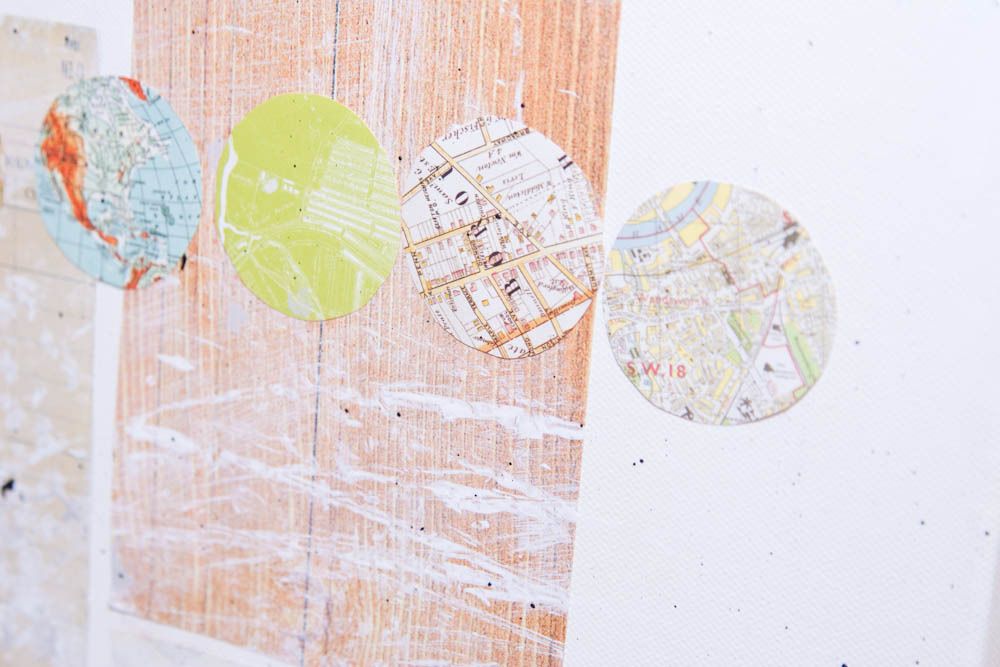
3. Use non traditional items to experience art and the world in new ways.
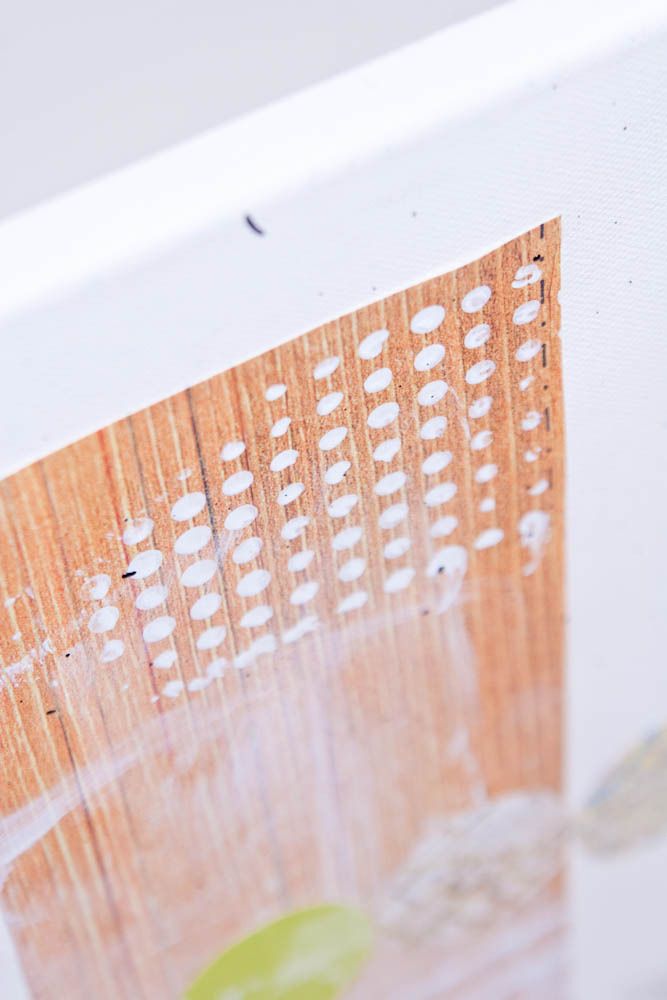
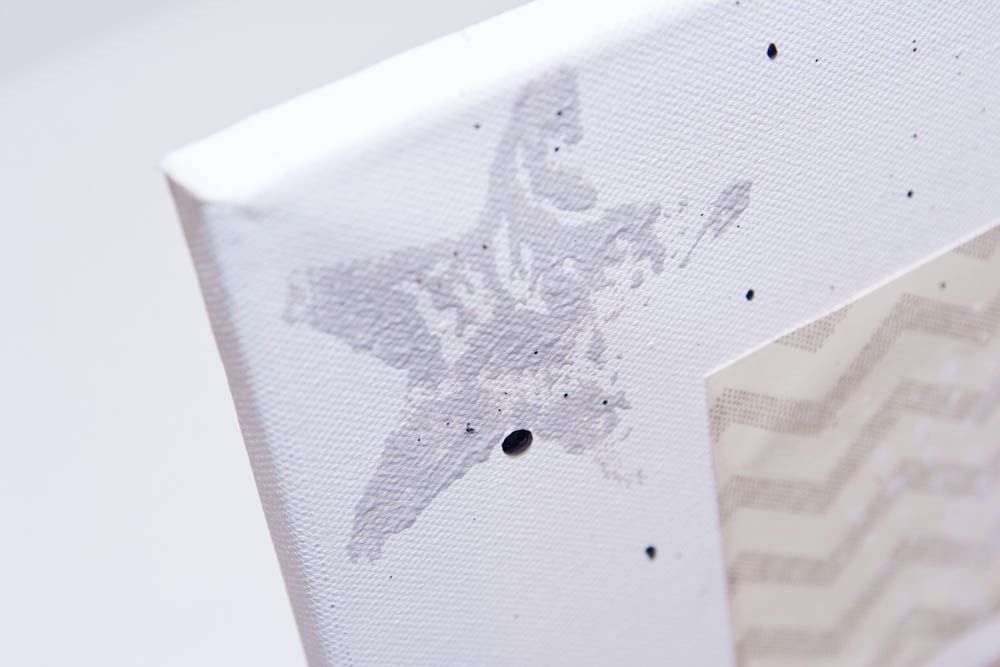
It was rare that you saw a paint brush at my art center. As my son was creating this piece, he was more excited at using the bubble wrap, dot stamp, massager, and star stamp. He verbalized, "Oh!" and "Wow!" with these items and with the brush, he kept on just asking if he was doing it right. Maybe with these non traditional items, children know there is more freedom to explore.
Try a feather, bubble wrap, sponges, rocks, or recycled items. I love even creating hard clay items one day and stamping them into paint another day. Tubing from the hardware store, marbles, or even toy cars are fun! When using larger items, encourage those small motor skills again by using clothes pins to help them "grab". For example, I clipped the bubble wrap with the clothes pin to create a stamp, while at the same time it was helping develop my son's small motors.
Some items in my paint supplies are from a recycle center called Creation Station in Lynnwood, Washington. This shop is filled with items that they save from the landfill and sell to artists, teachers, scientists, scrapbookers, homeschool groups, etc. Find a local recycle center and think outside the box of how you can use items as art for your child.
I am excited to share with you this week's video, of my five year old son creating this mixed media piece. He loves it so much that we have it already hanging in his room, inside a backless frame so that we can change out new pieces as he finishes them.
(Enlarge and play in high definition!)
Project time: 10 minutes. Drying time: 20 minutes.
A few notes: My son wears an under-shirt for his "paint" shirt since he will not wear smocks because they are not "soft." He also insisted on wearing his father's shoes to paint in. So, there you go.
I also had an extension cord with a heat gun to help dry the layers, but found out this was not needed. After my son was finished and I cleaned off the black paint from the side of my house, I made sure all the edges of the paper were down by adding a little more Helmar's Acid Free Glue to any curling paper from the paint.
Create Well: Develop a place where children can be free to create they way they were meant to; without restrictions or rules.


