


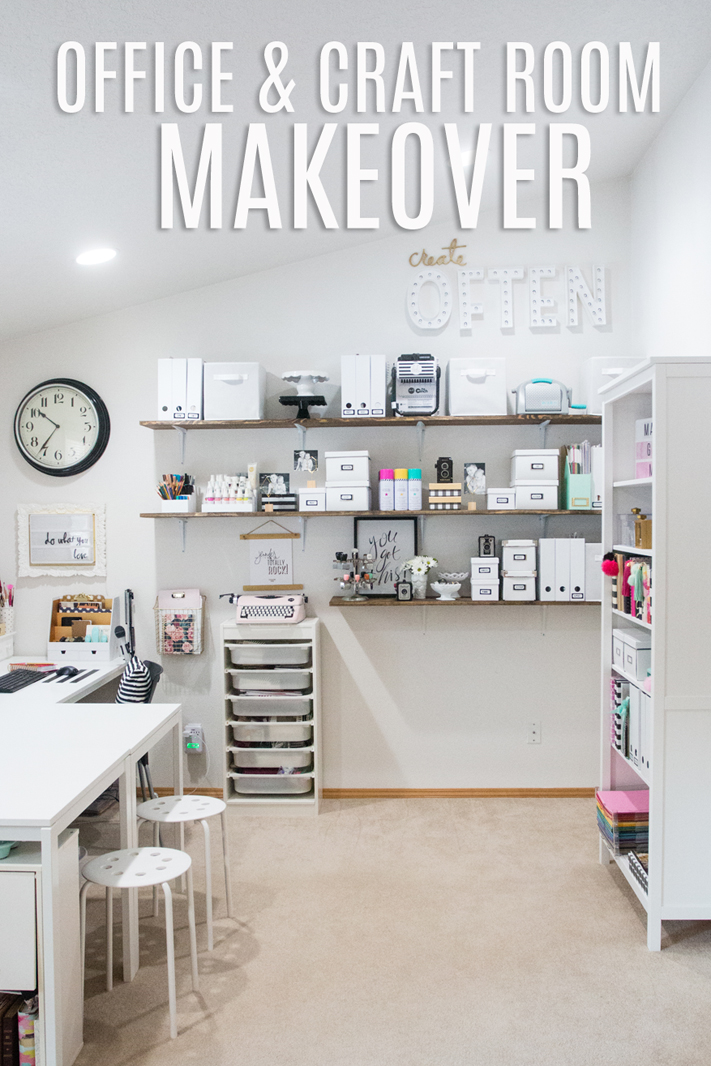
Thank you so much for all the kind words about my craft room and office make-over! I heard a lot of sweet words about the shelves and even some comments about how it looked high-end. Can you believe my husband and I built these from just 3 boards and for less than $60! Let me show you how easy it was!
This is a personal blog. All editorial content and projects are intellectual property of Create Often with Jennifer Evans. I am an employee and do receive financial compensation and material product from American Crafts to develop my craft posts. This post also has affiliate links, I receive a commission when products are purchased through links here at this blog, at no cost to you. I create what I love and love to share what I create. but all ideas and opinions are my own.

I wanted that industrial look with enough storage space while also keeping within my overall budget. I needed these shelves to be affordable and doable - since my husband and I are both not very handy, ha! Here is how I was able to create this look easily!

Supplies:
3 Pine Boards 1"x12"x8" (1 cut at Lowe's to 5 feet and the other 2 left 8 feet)
Drill
Level
Stud Finder

I had my husband go to Lowe's and pick up all the supplies. He even had the list that I gave off my Pinterest board with him. The website will even tell you where in your local store the item is so you don't have to walk all over the store looking for everything! He loved that. Ha! We also had a 10% off coupon we had found which made us happy!
Then, the bad weather in Oregon hit and I had to stain the boards in the garage. The boards took the stain beautifully, however it took a lot longer to dry in the colder temperatures. I followed the directions on the stain and there was instant satisfaction seeing the shelves turn a beautiful dark walnut. Just what I was looking for.

After the boards were dry, it was time to install the shelves.

You can see the steps we took to install the shelves above. (Top left to right)
Row 1 -
1. Measured the height of where each shelf would be and drew an even line across the wall.
2. Used a stud finder to mark where the bracket would be.
3. Screwed in the bracket. Use a level after each screw to make sure it is was still straight.
Row 2 -
1. Marked the holes with a pencil making sure the next bracket is level.
2 and 3. - Made sure each bracket was level and ready for the board.
Row 3 -
1. Placed board on top and used level to make sure it was straight.
2. Made sure it was flush against the walls.
3. Placed small screws inside and with someone holding the board in place with pressure had the other person screw the bracket into the board.

We are so happy with the way they turned out! Especially for less than $60!
I had the last board cut to only 5 feet but you could keep the full 8 foot board if you wanted. I just wanted to make sure I could get in and out of my chair at my desk without feeling confined.
To see the full make over reveal, check out this post here. For more details on how I store my craft supplies, check this post out here!
If you would like to see more details on where I got each piece of furniture or storage items, check out my Pinterest board shopping list. It is the same one I sent into the hardware store with my husband, lol!

Creating custom storage for your home office doesn't need to break the bank. With a little DIY you can build it yourself.


