


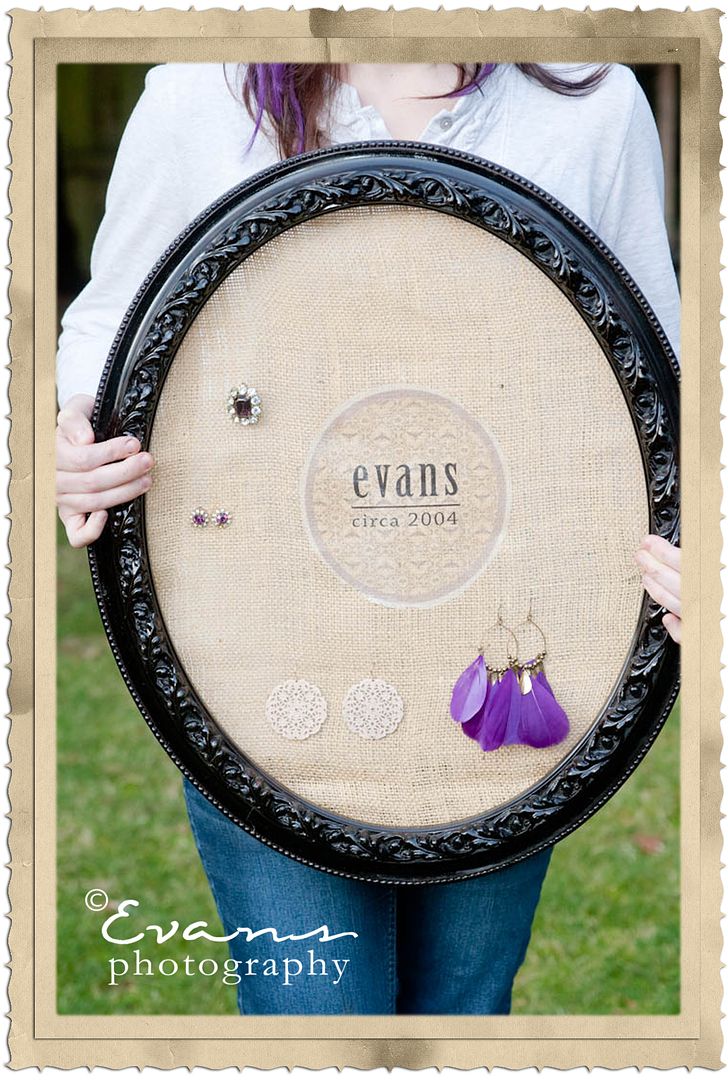
This month, I have two burlap hybrid projects to show! The first one is this re-purposed frame into an earring holder. For Christmas, I got these great feather earrings from Forever 21 (thanks Mum!). They go great with my purple hair extensions. ;) I think it is so funny that I spent an afternoon making this for my $4 earrings. Ha!
To create the frame follow these instructions:
1. Find a frame at a thrift store or re-purpose one like I have done. Remove the glass and back. Spray paint it the color of your choice. I used black for a classic look.
2. Next open Photoshop and create a new project by clicking on File, then New. Make your project 8.5 x 11 inches. Use 300 resolution on a white background and click on OK.
3. If you are new to Photoshop, find the tool bar and put your cursor over the tools. Find the Ellipse tool. Click on it. Then find the circle (or oval shape) and click on it. Then, on your document click and drag your mouse to create a circle. I made mine large enough to fit in the file leaving the edges clear. Make enough room for step 4.
4. Do this again to make a "mat" around your first circle.
5. Open your file of digital pattern paper. Drag the paper you wish to use for the mat into Photoshop. I used the Circle Grey paper from Samantha Walker's Honey Golden Sunlight Paper Pack. Then you want to make sure this layer is large enough to fit in the circle. On the right, you will see a list of your layers. Click on the paper layer you just added. Drag it to go above your mat layer. Then, on the top of your screen you will see "Layer" click the drop down menu and click on "Release Clipping Mask" (or short key for Photoshop CS2 Ctrl+Alt+G). This will make your gray paper into the mat.
6. Do step five again with the center circle this time. I used the Honey Comb from the same pack. It is vintage-chic with the bees on it!

7. On your tool bar you have a text tool. Click on it and then click again on your project. Find a font you like and begin typing. I used the year my husband and I were married. I wanted it to be something my husband could stand to look at. ;) A quote would work well too.
8. Save the project as a Photoshop document (Click Save As and then to your computer). I also saved it at as a JPEG by clicking Save As, JPEG, and then to my computer at 12, the highest quality image.
9. Next use a t-shirt printer transfer. I got mine at my local craft store. I followed the instructions on the package. It has an online program to reverse the image which I did. I then printed the image on the transfer paper.
10. According to the transfer's instructions, iron it to the burlap. Make sure the edges are all done. Burlap is a hard surface to iron to, so go slow in removing the backing.
11. Using a staple gun, staple the back of the burlap to the frame starting with the top then going to the bottom, side, to side, and then filling in the gaps.
12. Cut the excess burlap off and hang!

Here is another burlap project using the Harvest Moon Mega Pack. I love how many elements are in this kit. There are many you can use anytime of year! This digital frame was used with a quote this time (inspired from Pinterest). It is easier to make since you don't need to create any shapes using a digital frame.
"We are constantly invited to be what we are." - Henry David Thoreau
To be entered to win a $10 gift certificate to use in Samantha Walker's digital store and a can of Preserve Your Memories II Acrylic Spray care of Preserve Your Memories, make sure to leave a comment on my blog. One random winner will be picked from all the comments left on the design team members' blogs. To help increase your chance of winning, make sure to follow Samantha's blog or facebook page. Then, comment again letting us know you have! (Note: Shipping for the Acrylic Spray is only available in the US due to mailing aerosol restrictions.)
Click on the link below to go on to the next team member's blog to see what they've created!
Click on the link below to go on to the next team member's blog to see what they've created!

Create Well: Use burlap and iron-on transfers to create a home decor piece you would be proud of!


